

That time of year is rolling around again, and we’ve got science fair project ideas on the brain. This is a relatively easy project, but it can be expanded upon, like many of the experiments we post. Today, we’re going to focus on how to measure the moisture level of food and knowing when it is dry enough to store in order to prevent spoilage.
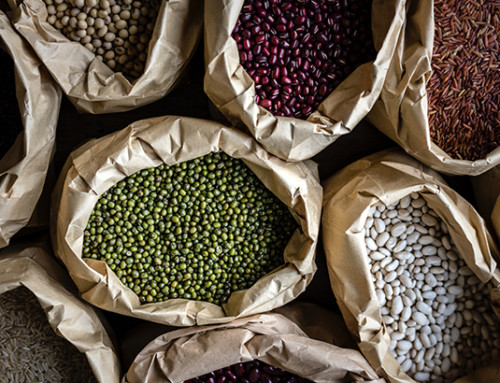
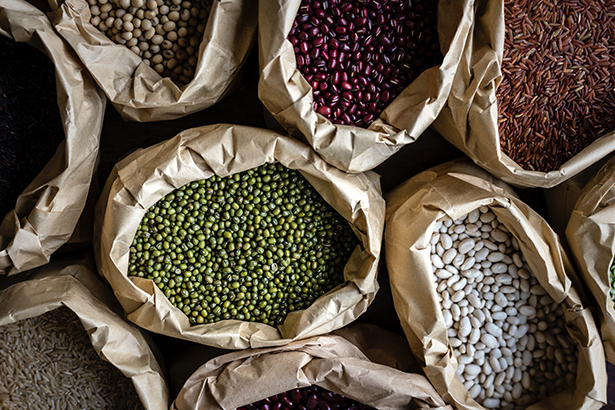
Many of us here in the office enjoy locally grown and organic produce. We have a few CSA members (Community Supported Agriculture) who know the local farmers and some of their struggles in dealing with Mother Nature. One concern is preventing spoilage in foods that are dried and packaged, such as peppers, beans, fruit, herbs, onions, etc. If the produce is not dry enough to store, mold growth can become a problem.
While larger farms may have drying equipment, small-scale farmers and folks at home growing a small vegetable garden might not have this luxury. So, what can they do to reduce the likelihood of spoilage? Let’s experiment!
Materials
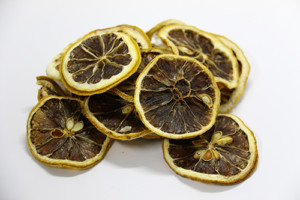
- Fresh fruits or vegetables (2-5)
- Dried fruits or vegetables (2-5)
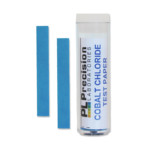
- Cobalt Chloride Test Paper
- Humidity Test Strips
- Ziplock bags, clear jars, or clear storage containers (one for each item of produce)
- Tape
Procedure
- Start by placing each type of fresh fruit or vegetable in its own sealable clear bag, jar, or container.
- Tape one strip of cobalt chloride test paper in each container.
- Tape one humidity test strip in each container, facing out so you can see the test pads as they change color. Seal each container.
- Repeat steps 1-3 with the dried fruits or vegetables.
- After 20 minutes, observe the cobalt chloride test paper. How does the color compare for the fresh versus dried produce? Observe the humidity test strips. What percent relative humidity do the strips show in each container? Record your results.
- Next, let’s start drying some of the fresh produce. To give this experiment some variation and test different drying methods, try both sun-drying and oven drying. Make sure your produce is clean and ripe. Juicy items should be cut up first. Lay produce out in a single layer with plenty of space between. Crowding produce together may not allow enough air to circulate freely, resulting in mold. This could be another experiment variation: how the drying produce is arranged differently and the effect it has on spoilage.
- Place the produce on something like cookie sheets, foil, or butcher paper to dry. If drying outside in the sun, place a protective netting, such as cheesecloth, on the food to keep insects off.
- If drying fresh produce in the oven, set the temperature at a low setting, such as 140°F, or the lowest setting. Some vegetables may need to be blanched before drying. Most produce will take less than 6 hours to completely dry. Ideally, for this experiment, we want to test the produce at various levels of dryness. Thus, dry some for an hour, some for 2-3 hours, and some for 5-6 hours. Remove a few after an hour and place in a container with a strip of cobalt chloride test paper and a humidity strip taped inside. Repeat with a few more items after 2-3 hours, and the remaining produce after 5-6 hours. Make sure the produce has cooled before placing in the container. Record results.
- If drying in the sun, it can take 3-7 days depending on the type of produce and the weather conditions. Just like oven drying, we want to check the produce at different intervals for comparison. Follow a similar procedure as in step 8, but expand from hourly intervals to daily/days. Record results. Make sure you test some produce that has completely dried.
- Compare your results and make conclusions about how best to dry fresh produce for optimal storage and spoilage reduction.
You should find noticeable differences in color changes and test strip results throughout the drying process. Once the produce is completely dry, there should be little to no moisture. This should yield the same results as the produce that was already dried. If there is still some moisture in the produce you dried, where do you think it’s coming from and how will it affect the produce? How long did it take to dry the produce using the different methods, and how did it vary among different types of produce? What did you find to be the ideal drying time for each method, and what was the ideal method?
Going Further
There are additional ways to take this experiment a step further. Taste test your dried produce. Did you find a difference in taste between the different drying methods and drying times?
Experiment further to see how long it takes for the produce to spoil. Use our dipslides to test for contaminants or visually inspect over time to see mold growth.
Try measuring the moisture level in each container after 30 minutes, instead of just 15 minutes. Does that make a difference in your results?
Try taping cobalt chloride paper to the produce as it dries in the sun. As the produce dries, does the paper slowly revert back to it’s original blue color?
How else can you take this experiment a step further?


Leave A Comment