

The US EPA is a great resource for environmental research, data, lesson plans, experiments, you name it. They provide wonderful teacher resources on their website on a variety of topics, and they’ve even got a kid-friendly sections as well. We found a great experiment hidden in their teacher resources about observing the influence of acid rain on plant growth, and it’s so fantastic, we wanted to share it.
Here’s what you’ll need:
- pH 1-14 test strips
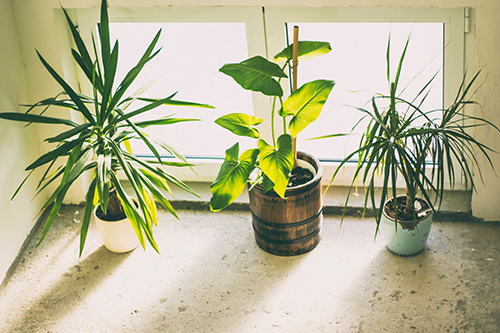
- 3 healthy potted plants (same plant, one per group)
- 3 one-gallon containers with lids (for example, a milk jug) (one per group)
- 1 pint white vinegar
- Tap water
- Measuring cup (1 pint)
Procedure:
- Divide your students up into 3 groups. Each group needs a one-gallon container and a potted plant.
- Group 1 will fill their container with 1 gall of tap water and label the container “tap water”. Label the potted plant the same.
- Group 2 will fill their container with 1 pint of vinegar and 7 pints of tap water and label the container “slightly acidic”. Label the potted plant the same.
- Group 3 will fill their container with 2 pints of vinegar and 6 pints of tap water and label the container “very acidic”. Label the potted plant the same.
- Each group will test the pH of their mixture using the pH 1-14 test strips. Simply dip the test strip into the mixture, remove and compare with the color chart. Perform the test three times and record each result.
- Each group is responsible for watering their plant with the solution from their corresponding container. Plants should be watered as needed, approximately every 2-4 days. Make sure each group’s plant gets the same amount of water by providing them with a measuring cup to use when watering.
- All plants should also be located in the same area to ensure they get the same amount of sunlight and they are at the same temperature.
- Have the students hypothesize what they think will happen to each plant. Will they differ after a few weeks? How? Why?
- The students should examine their plants daily and record their observations. Answer questions like, what do the plants look like? What color are they? Are the leaves drooping or falling off? Do they look healthy? Do they have any new growth?
- This experiment should take course over a period of 2-3 weeks. At the end, students should examine the plants again and discuss or give presentations on the results of the experiment.
- Here are some questions to answer:
- Do the plants watered with acid solutions differ in color or size from the others?
- How long did it take to see the effects of each mixture?
- Which plant showed the most effects? Why?
- Were your hypotheses correct?
Going Further
Here are a few suggestions on how to take this experiment a step further:
- If available, try having 2 or 3 sets of potted plants. In other words, 3 plants of one kind, 3 plants of another kind, 3 plants of another kind. One set could be a hearty plant, one that is middle-of-the-road, and one that is a bit more finicky. Have the students observe the effects of “acid rain” on different plant types.
- Try testing the pH of the soil along the way. Test the pH of the soil at the beginning of the experiment, in the middle, and at the end. What does the acid do to the soil? Soil testing can be done using a coffee filter. Place soil in the filter over a beaker or empty cup, pour distilled water with a neutral pH over the soil until you have enough to test with a strip. Alternatively, combine soil and distilled water, shake and stir for a bit, then pour into the coffee filter.
- Try this experiment with alternative acid sources, or acids of a different pH value. For example, lemon juice, orange juice, tomato juice and soda can be used as acids.
As always, have fun experimenting, try to come up with some of your own twists, and learn along the way!


Leave A Comment